TigerPaw Business Suite Integration (SQL Server)
Click here for Tigerpaw 9 and 10 Account Integration
For more information on Tigerpaw, visit their website www.tigerpawsoftware.com/
To create an ODBC database link to Tigerpaw
- Click on Start> Settings> Administrative Tools> Data Sources (ODBC)
- Click on the “System DNS” tab and click on new
- Using the SQL Server driver, create a new System DNS named “AlarmTraq_Tigerpaw” that points to the Tigerpaw database.
To enable the database link in AlarmTraq (Provider = SQLOLEDB):
- Open AlarmTraq
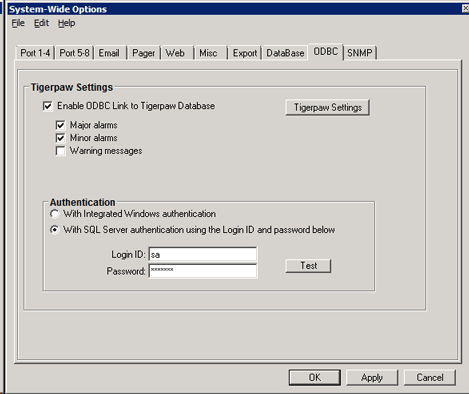
- Click on Edit > System-Wide Options > Export
- Select the "Enable ODBC Link (SQL Tigerpaw9)" checkbox
- Click on "OK"
- Click on Edit > Customer Profiles
- Enter the TigerPaw account number in the "Account Number" field. (Repeat for all customer)
The Tigerpaw Business Suite contains a stored procedure named tsp_CreateServiceOrder. This procedure creates a service order with the same data populated as if the user had clicked the ‘New’ button on the service order view.
As long as the account number field in the "Customer Profiles" form matches a valid TigerPaw account number, the system will automatically enter a new Service Order when an alarm is received from the Definity or Audix system. Alarms are received by AlarmTraq and entered into the tblServiceOrders table of the Tigerpaw database using:

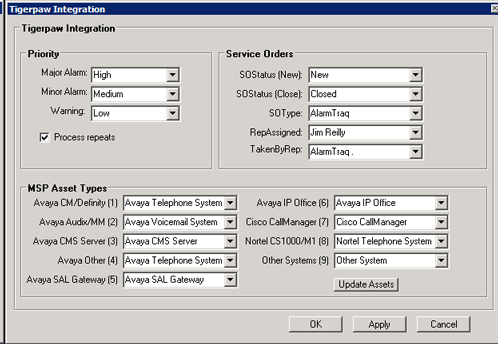
Click on the Tigerpaw Settings button

Fields
Status = Enter a valid SO status condition (default = “Open”)
TakenBy = Enter a number that represents a valid “TakenBy” (default = 1)
TechAssigned = Enter a number that represents a valid “TexhAssigned” (default = 1)
Type = Enter a valid SO Type (default = “Phone Support”)
Priority
Major Alarm = Enter a valid priority to assign to this alarm (default = High)
Minor Alarm = Enter a valid priority to assign to this alarm (default = Medium)
Warning = Enter a valid priority to assign to this alarm (default = Low)
