Upgrading from AlarmTraq version 7 (or above) to AlarmTraq version 9
This procedure will use your existing SQL Connection and database to work with version 9.0
Backup and uninstall the previous version of AlarmTraq
Rebuild the SQL Stored Procedures and Functions
Step 1: Backup your existing AlarmTraq folder (\Program Files\AlarmTraq\) to a safe location (desktop or temporary directory). Some files may need to be transferred back to the AlarmTraq folder later. These files may include custom logo files from the \Web folder, or email templates from the \Templates folder.
Step 2: Uninstall AlarmTraq using Windows Control Panel > Add/remove Programs.
Step 3: Download the full package (AlarmTraq.zip) from the downloads section of the Support Site located at http://www.reillytele.com/AlarmTraq/supportsite/.s
Step 4: Unzip the AlarmTraq.zip file to a temporary directory on your server. In this example we created a new folder in the root of the C drive named C:\AlarmTraqinstall\.
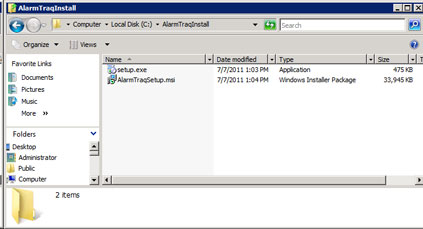
Open temporary installation folder
Step 5: Double click the setup.exe file to begin the installation. When the form loads, click Next.
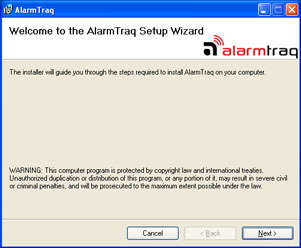
Step 5
Step 6: Read and agree to the software license agreement, click Next.
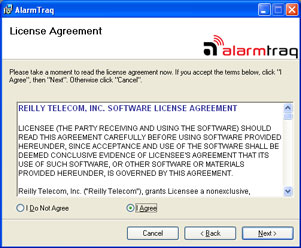
Step 6
Step 7: Select the installation folder and click Next.
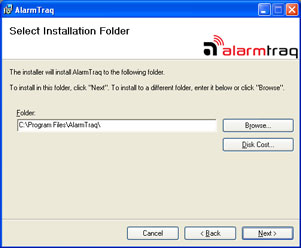
Step 7
Step 8: Confirm the installation and click Next.
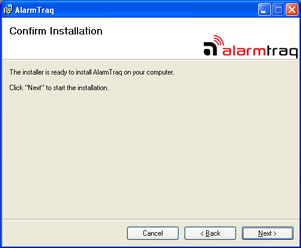
Step 8
Step 9: Wait while AlarmTraq 7.2 is installed on your server, this could take several minutes.
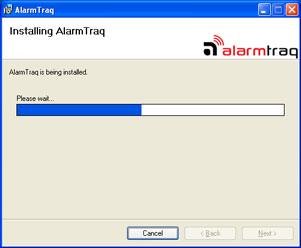
Step 9
Step 10: When the installation has completed, click Close.
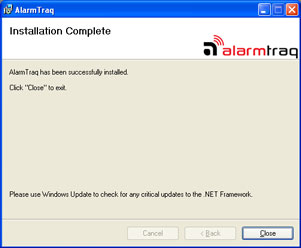
Step 10
Step 11: Double-click the new AlarmTraq shortcut on your desktop to launch AlarmTraq. The first time you run version 9.0, several new tables will be added or updated to the SQL database. When completed, the main form will be visible.
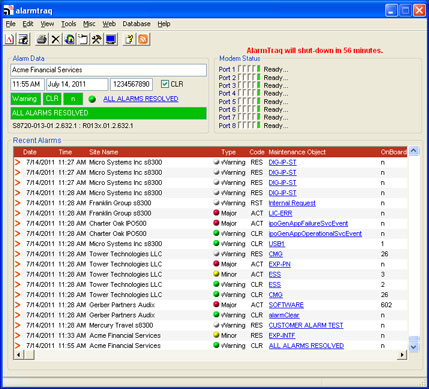
AlarmTraq Main Form
Step 12: The next step involves rebuilding the stored procedures and functions in the SQL database. Open Microsoft SQL Server Management Studio (MSSMS) and click on File > Open > File.
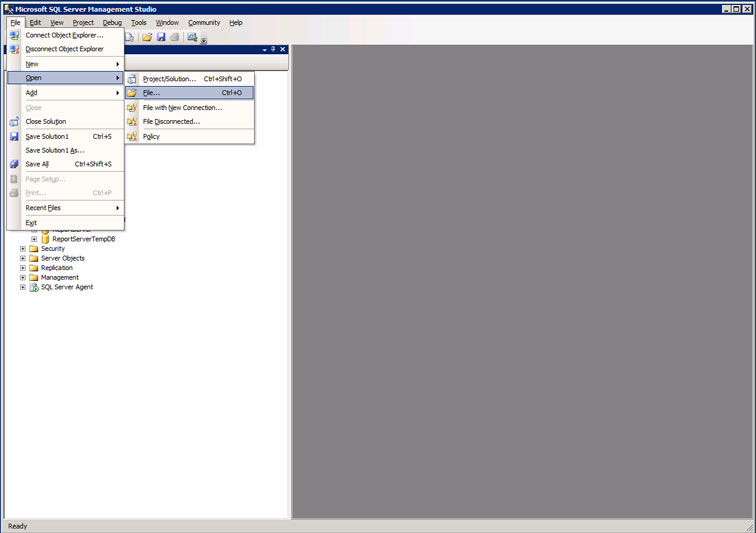
Microsoft SQL Server Management Studio
Step 13: Navigate to the \AlarmTraq\Tools folder and select the Rebuild_Stored_Procedures_73.sql file then click Open.
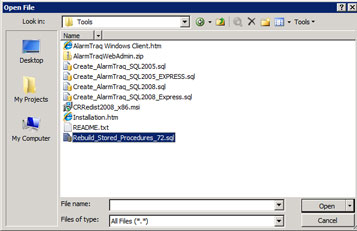
Microsoft SQL Server Management Studio
Step 14: Once the SQL script file is loaded, click the Execute button located on the toolbar.
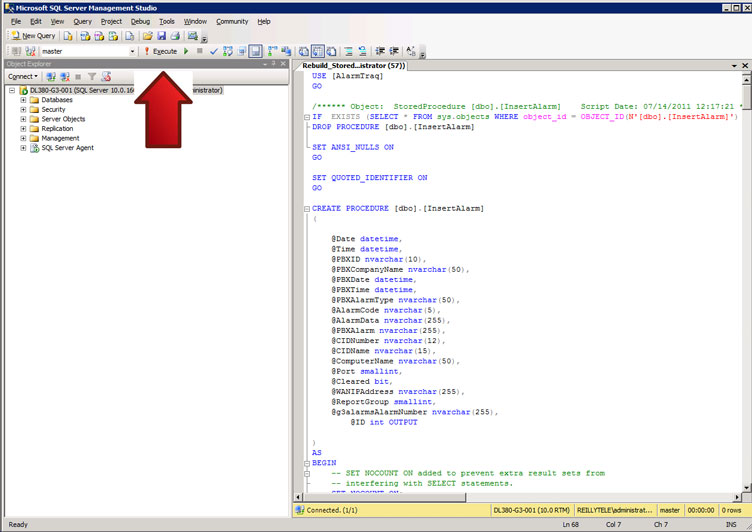
Microsoft SQL Server Management Studio
Step 15: Once the script has finished executing, you should see a message saying Command(s) completed successfully at the bottom of the screen in the Messages section. In the Object Explorer window to the left, right-click the AlarmTraq database and select Refresh.
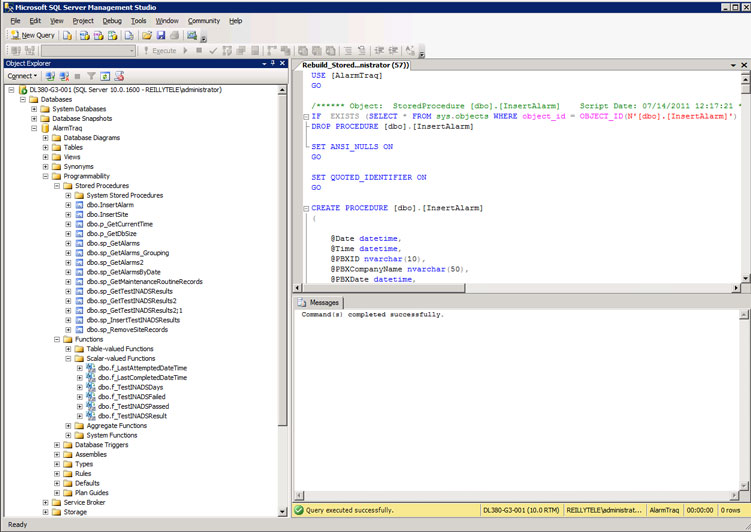
Microsoft SQL Server Management Studio
Step 16: Verify the Stored Procedures and Scalar-valued Functions are now populated in the database (see above picture).
And that's it. Your AlarmTraq version 9.0 installation is now completed
