Configure an S8xxx to send alarms via SNMP
SNMP (Simple Network Management Protocol) is a standard way for computers to share networking information. In SNMP, two types of communicating devices exist: agents and managers. An agent (S8XXX) provides information to a manager application (AlarmTraq) running on another computer. The agents and managers share a database of information, called the Management Information Base (MIB).
An SNMP trap is a notification event usually issued by the agent (S8XXX) to the manager (AlarmTraq) when a significant event (an alarm, fault, or a security violation) occurs.
Use the following Web pages in the Avaya Integrated Management interface to configure an S8xxx server to send alarms to AlarmTraq via SNMP traps.
First, open your web browser and connect to the S8XXX system and login from the Maintenance Web Interface.
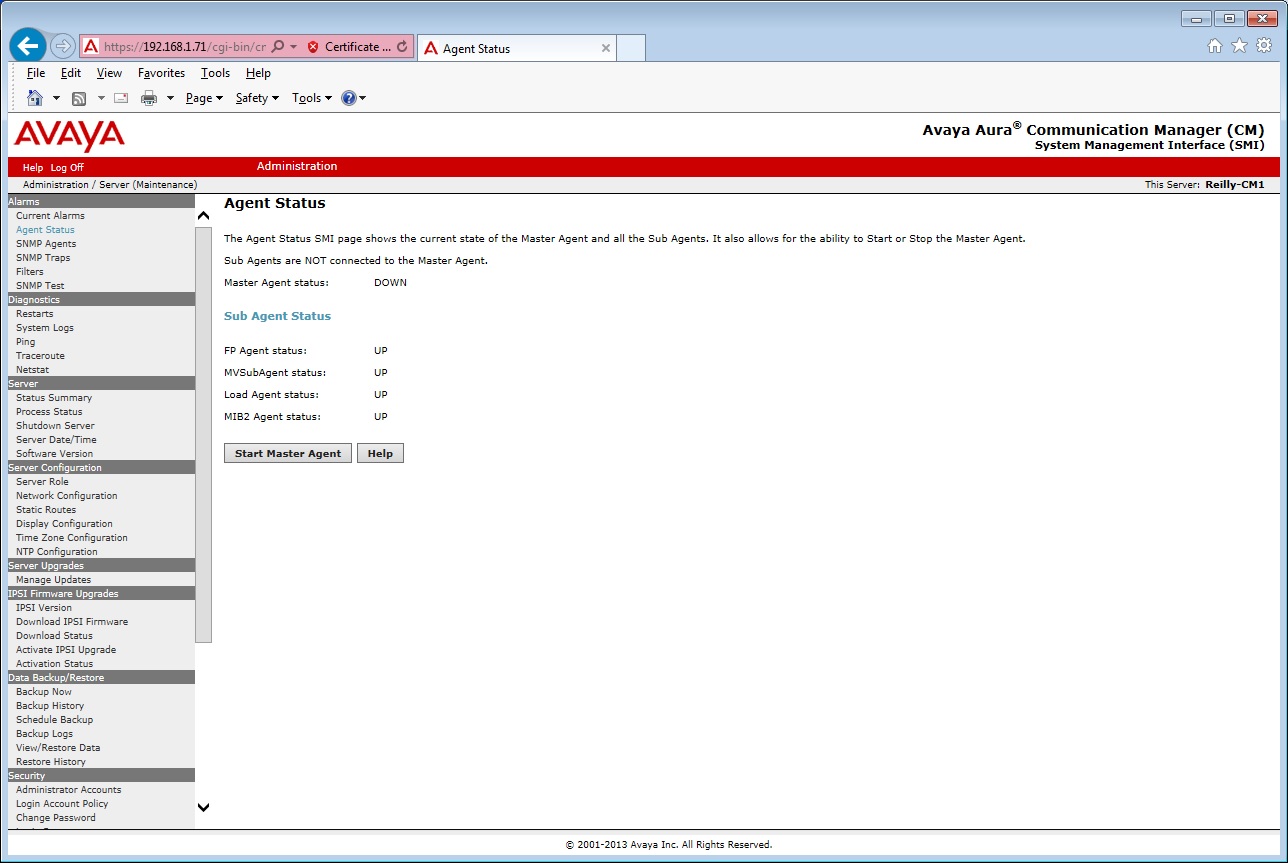
Step 1
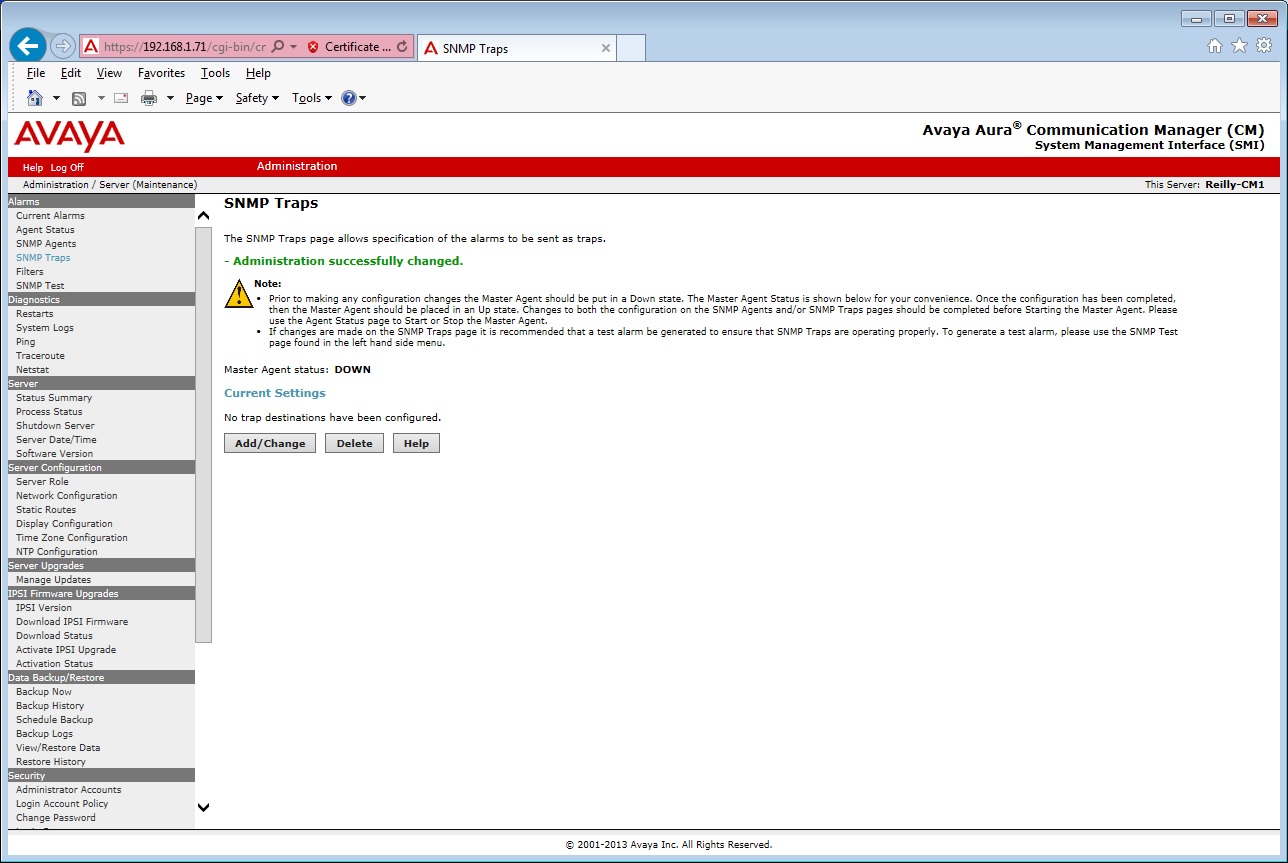
Open the Agent Status page.
If the Master Agent Status is Up, click the Stop Master Agent button before proceeding. This action is not service affecting.

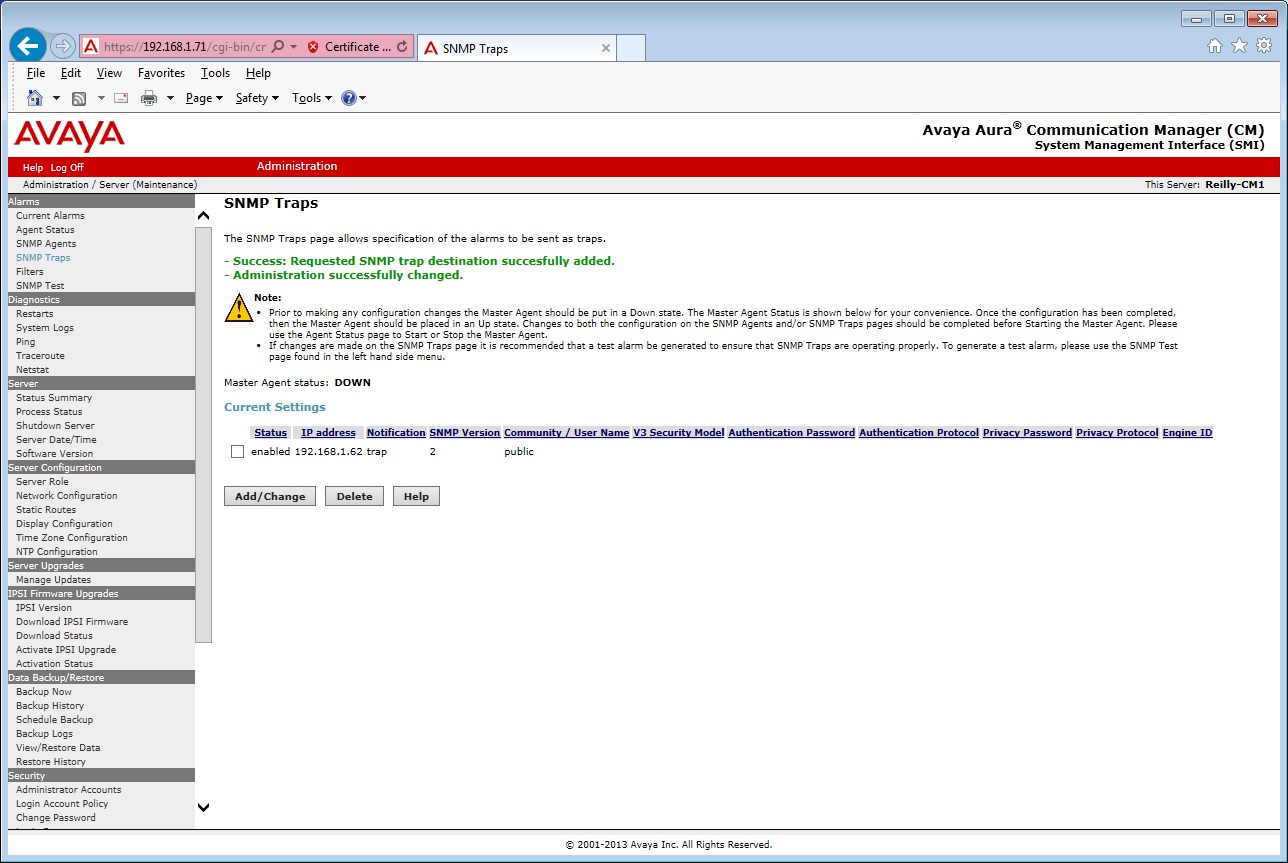
Step 2
Open the SNMP Traps page.
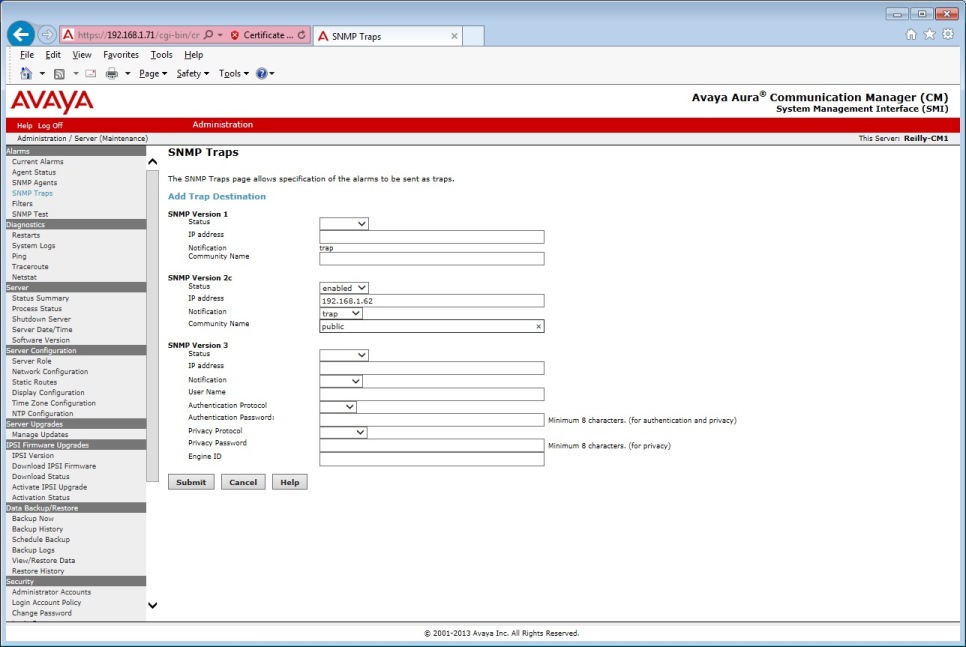
Click the Add/Change button to add a new SNMP trap destination IP Address.
Step 3
Continue to Add Trap Destination
You will need to know the internet IP address of the AlarmTraq server to complete this form. If you are unsure of your public internet IP address, consult with your router administrator to determine the correct address to use.
- Select either SNMP version 1 or SNMP version 2c (For SNMP version 3 click here)
- Enter the IP Address assigned to your AlarmTraq server
- Enter the Notification to trap
- Enter the Community name (AlarmTraq expects "public" as the default)
- Click the Submit button
Step 4
Verify your settings are correct.
Step 5
Go back to the Agent Status page and click the Start Master Agent button. The Master Agent should be placed in an Up state. Changes to both the configuration on the SNMP Agents and/or SNMP Traps pages should be completed before starting the Master Agent.
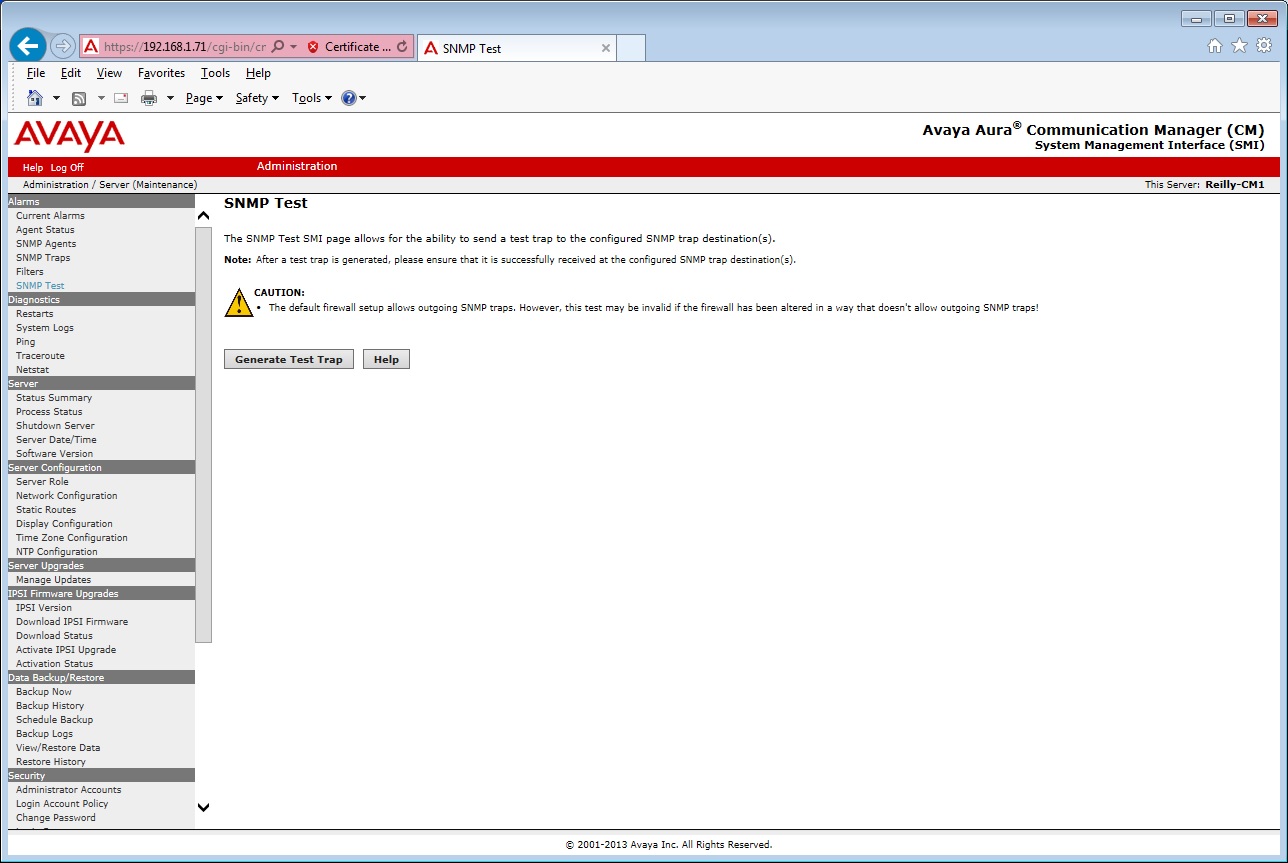
Step 6
Open the SNMP Test page.
Once the SNMP trap destination has been configured, you can verify your new SNMP connection by sending a test trap to the AlarmTraq server by clicking on the Generate Test Trap button.
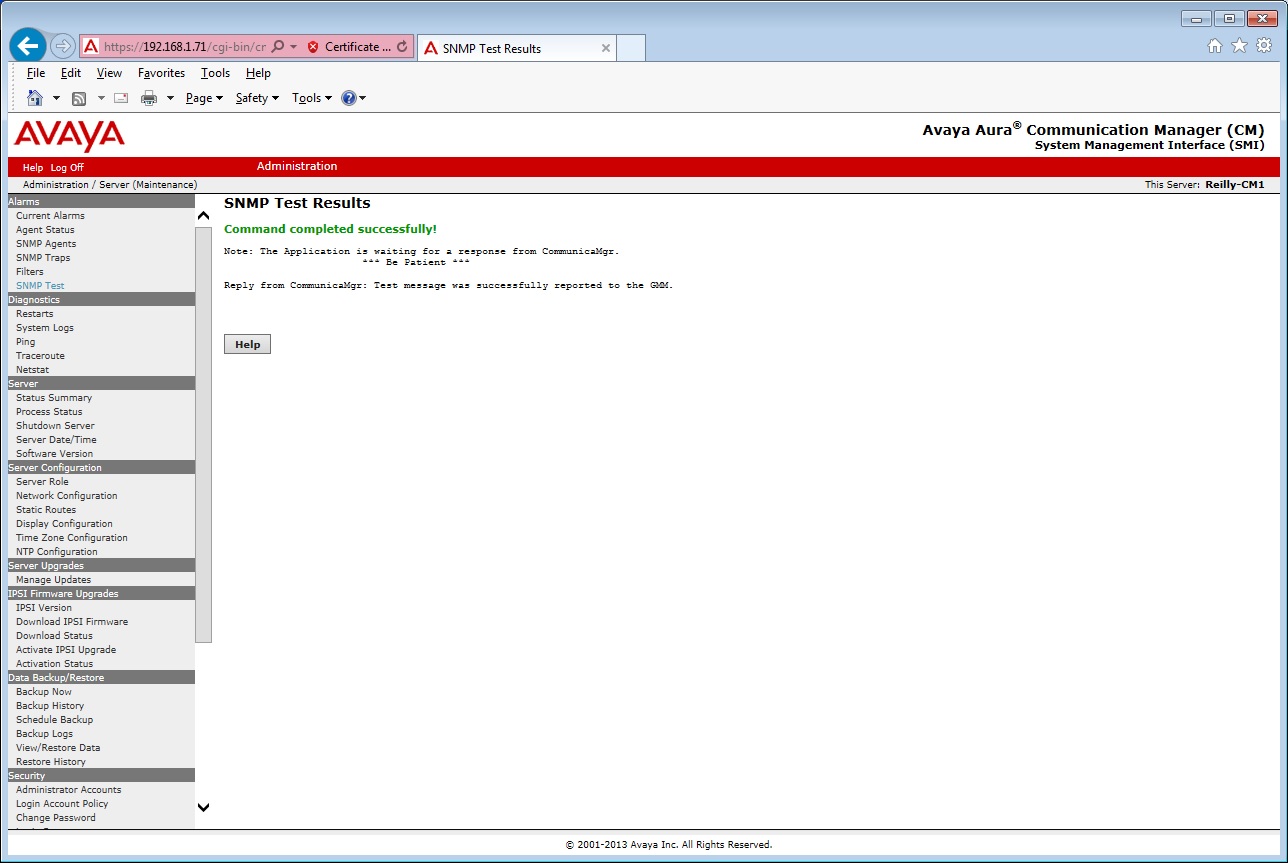
Step 7
If the SNMP trap was sent successfully, you should receive a reply from switch:
Note: The Application is waiting for a response from CommunicaMgr.

                *** Be Patient ***

                Reply from CommunicaMgr: Test message wa successfully report to the GMM.
Step 8
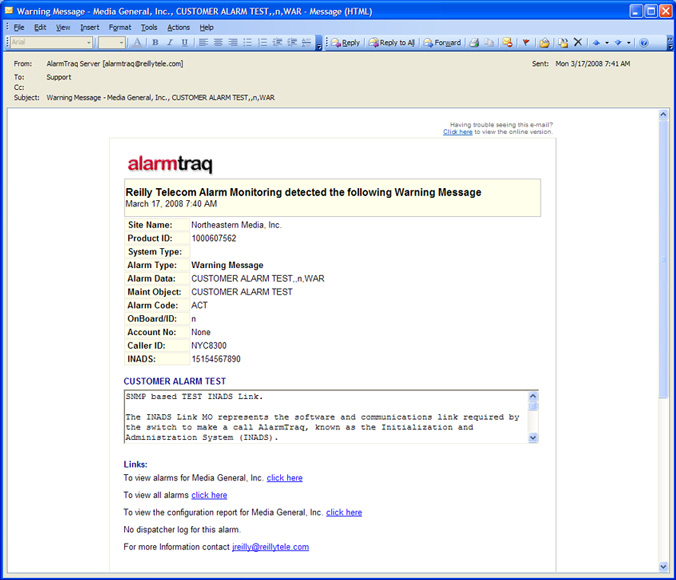
If the SNMP trap was received successfully, you should receive a "Warning" message from AlarmTraq listed as "CUSTOMER ALARM TEST".